TYPES OF LAMINATE

  • Heat Activated – The adhesive requires high levels of heat to be activated before it will adhere to the media.
  • Pressure Sensitive – The adhesive is aggressive and requires pressure to adhere to the print. Heat is not required with this laminate.
  • Liquid – Applied by hand using a brush, roller or a spray gun applicator. It can be used with a roll-to-roll liquid laminator.

APPLICATIONS & USES

Laminates are designed to be used in a variety of applications. A quality laminate protects the ink or toner from environmental conditions such as water and dirt. Some products offer additional UV protection to increase print durability and lifespan. Laminates can also be used to change the appearance or finish of the graphic. Changing a print from a matte to a gloss finish or adding texture are good application examples.

COMPATIBILITY

It’s important to pick a laminate that is compatible with your media. Vinyl laminate should be used to laminate vinyl media and polyester laminate should be used to laminate polyester. Choosing an incompatible laminate can result in a product failure. This could result in a costly reprint of the entire project.

MEDIA PREPARATION

Allow the print to dry completely before applying an over laminate. Refer to the OEM’s drying instructions for your ink set. It’s best practice in our industry to allow the print to dry for 24 hours. This additional time will ensure the ink has cured and prevent lamination issues. Wipe the print with a clean, lint free cloth to remove dust and debris before applying the over laminate.

LAMINATION PROCEDURE FOR PRESSURE SENSITIVE FILM

  1. Make sure the rollers in the laminator are clean.
  2. Feed the laminate into the laminator following the manufacturer’s instructions.
    1. Use tape to secure the laminate liner to the upper wind-up shaft.
    2. Pull the laminate through the area where the upper and lower roller meet (nip) until it is about 1 foot past the rollers.
  3. Set the laminator pressure at the OEM’s recommended setting to avoid wrinkles.
  4. Lower the upper laminator roller.
  5. Set the motor to run in the FORWARD direction. The speed should be set at approximately 2 feet per minute.
  6. Slowly start the laminator. Make sure there are no wrinkles in the laminate as it passes through the rollers.

Note: If wrinkles occur, increase or decrease the pressure setting until the laminate smooths out.

  1. Increase the motor speed to about 15 feet per minute.
  2. Slide the printed media through the in-feed table alongside the guide bar.
  3. Release the finished print from the machine using a safety knife.
  4. Trim the finished print.

TIPS & TRICKS

Set the laminator to the proper settings before starting your project. Settings include temperature, tension, and pressure. The temperature may have to be increased due to laminator heating coil age or the size of the rollers. Limit the amount of tension during the application of the laminate through the laminator. After application, allow the laminate adhesive to cure overnight if possible.

If possible, design your graphic with a non-imaged border around the edges. The laminate will bond more aggressively to the non-imaged border. It is also recommended to leave some unprinted media in front of your print. This will allow you to check for wrinkles or problems with your laminator beforehand. Follow the recommended ink saturation levels. Failure to do so may result in laminate adhesion failure.

Various environmental factors will impact the effectiveness of the adhesion. It is important to limit the amount of stress that causes adhesive failure. Since laminated graphics are comprised of several components it is likely that at least one layer will fail. Whether it be the coating to substrate or bond coat layer, coating or ink to laminate adhesive layer, the coating layer itself or the adhesive itself.

Encapsulating your graphics will produce better results than laminating the front and back. Encapsulation provides adhesive to adhesive bond and seals the graphic ensuring complete water fastness. Encapsulate with a ¼”- ½” border around the edges of the print.

Trimming the edges will promote stress and can decrease the effectiveness of the adhesion. If trimming is necessary, wait at least 1 hour before doing so and use a sharp blade. When transporting, wrap the laminated media loosely, wrapping it tightly may affect the adhesion as well.

TROUBLESHOOTING 

Laminating takes practice, you may experience a variety of issues the first few times you laminate. Common issues that may arise are listed below:

  • Cloudy lamination is a result of insufficient heat.
  • Bubbles in the laminate is a result of the temperature being too high or the image not being completely dry.
  • Silvering is caused when the adhesive does not wet out. Silvering can be eliminated by either increasing the temperature or slowing down the speed. It may be necessary to do both.
  • Over laminating one side with too much tension can cause the product to curl toward the laminated side and the edges to lift.

SURFACE PREP BEFORE PRINTING

Clean your printer thoroughly of dust and debris that could stick to the product.  The adhesive side of the window perf is the print side. Do not use the take-up reel with this type of product. For large projects or overnight runs, lay a piece of non-stick backer on the floor for the product to lay on.

PRINTING

When printing of NEWVUE, the media sensor detector may see through the perforation holes causing the print job to delete or result is a “media out” error. Cover the media sensor detector with masking tape to prevent this from happening. Remove the masking tape after the print job is complete.

AFTER PRINTING

When your image is done printing carefully cut the image off the printer and lay it flat on a table or wind it loosely with the image size out and stand it on one end. Perforated window films should be cut by hand.

SHIPMENT/TRANSPORTATION

When shipping sheets, place a piece of silicone lined paper over the printed/adhesive side of the product to protect it from dust and debris. When shipping tubes, place a piece of silicone lined paper over the printed/adhesive side of the product to protect it from dust and debris. Wind image side out on a 3”+ core. If the product is being stored in anything other than its original packaging do not stack it.

PRE-INSTALLATION

Clean windows thoroughly with soap and water. Isopropyl alcohol can be used to remove any additional residue. Do not use ammonia or glass cleaner such as Windex. Dry the glass completely with a lint-free cloth. The glass should be between 40º F and 80º F. Smaller panels can be applied dry. Unlaminated larger panels can be applied using a small amount of application fluid such as Rapid Tac. The fluid should completely evaporate after the panel is applied to the window.

INSTALLATION

Allow the window film to lay flat for at least 1 hour before installing. Peel the edge of the liner off the vinyl and fold it back 3 to 6 inches. Align the graphic to the window and gently press the top corners down. Press the film against the window using a soft plastic squeegee. Continue peeling the liner and gently pressing the film down until the liner is removed. Trim any excess film with a utility knife. Squeegee the film starting in the center to the edges. Be sure that the edges and corners are firmly against the windows. If your graphic is on more than one panel, carefully align the graphics with the previous panel so the edges butt against each other with the holes aligned. Do not overlap the film.

PREPARATION

Allow images to dry for at least 24 hours before handling. Desired surface treatments should be applied and completely dry prior to stretching onto a frame. It is recommended to allow canvas to rest in room temperature for several hours before stretching. Canvas should not be stretched in temperatures below 65˚F as canvas is more susceptible to cracking in cold environments. The ideal environment for stretching canvas is 50% RH/70˚F. For best results, line a table with felt to help protect the print during the stretching process.

LIQUID LAMINATES

ClearShield Canvas Guard or similar products are recommended to protect and prolong the life of Magic’s TORINO canvases. Use a high-density foam roller or a 3/16″ short-nap roller. Immerse the roller in the liquid. The roller should be completely covered but not dripping. Blot excess liquid with a piece of paper.  Roll a thin layer of the liquid laminate onto the canvas starting on one side working your way to the other. Let this first coat dry for 30 to 60 minutes. Roll another thin to medium layer onto the canvas.

THE FRAME

Stretcher bars with rounded edges are preferable verses stretcher bars with sharp edges. Ensure the frame is square by measuring across the diagonal corners, the measurements should be equal. Add a cross brace if desired. Cross braces are recommended for stretcher frames 24”x36” and larger.

THE CANVAS

Cut the canvas 4” longer than the assembled stretcher frame on all four sides. Canvas should be snug but not overstretched across the frame.

MOUNTING

  1. Staple one side of the canvas to the frame starting in the center. Insert 3 staples 1.5” to 2” apart.
  2. Rotate frame to opposite side and be careful not to drag the canvas across the table.
  3. Use stretching pliers to grasp the edge of the canvas in the center and pull taut.
  4. Staple the canvas to the frame starting in the center as you did on the opposite side.
  5. Repeat this process on the two unattached sides.
  6. Add 2 staples to each side of the first staples. Ensure the canvas is secured on all edges with staples.

FINISHING

  1. Double fold the canvas at the corners. The final fold should line up with the edge of the frame.
  2. Staple the folded canvas to the back of the frame.
  3. Fold any excess canvas to the back of the frame and staple.

Note: To reduce canvas bulk at the corners of the frame, consider using wedge corner cuts.

STORAGE

Stretched canvas should be stored in the vertical position. Avoid leaning canvas prints against each other. If you cannot avoid this, place glassine or craft paper between the canvases.

SURFACE PREPARATION

Before installation, thoroughly clean the application surface.

  • Remove any additional residual residue such as tape with a razor blade.
  • Plastics and glass surfaces should be cleaned with window cleaner such as Windex. Wipe the surface with a lint-free cloth until dry.
  • Painted metals and base metals should be cleaned with solvent cleaners such as Xylol Xylene or lacquer thinner.  Wipe the surface with a lint-free cloth until dry.
  • Allow newly painted surfaces to dry for at least 72 hours before installing vinyl graphics.
  • Painted surfaces should be cleaned with household cleaners such as Fantastic or 409. Wipe the surface with a lint-free cloth until dry.

APPLICATION TEMPERATURE

The optimum temperature range to install vinyl is 60°F (16°C) – 90°F (32°C).

INSTALLATION

Vinyl graphics have three components, the pre-mask which is the top surface, the vinyl graphic and the wax paper liner which is the bottom surface.

  1. Attach the vinyl graphic to the application surface with small pieces of masking tape.
  2. Place a strip of masking tape across the top of the graphic. Half of the tape should be on the graphic and the other half should be on the application surface.  The tape will act as a “hinge” which will keep the graphic in place during application.
  3. Hold the bottom edge of the vinyl graphic away from the application surface and carefully remove the wax paper liner. Do not let the adhesive side of the graphic touch the surface yet.
  4. Hold the vinyl graphic away from the application surface. Starting from the top working your way to the bottom, firmly squeegee the vinyl to the surface working from the center out. Do not let the entire graphic fall onto the surface. If creases develop, carefully lift and adjust the graphic as needed.
  5. Carefully peel the pre-mask from the graphic at a 180-degree angle back over itself.
  6. If there are any remaining air bubbles in the vinyl, put a piece of leftover liner over the graphic with the shiny side facing outwards and press down firmly with a squeegee to remove the bubbles

PROTECTING THE BANNER

A thin pressure sensitive adhesive overlaminate can be used to protect most banners except for vinyl. Applying laminates to one side of a banner may result in inwards curling and adhesion failure. It is recommended to pretest all protectants on a sample of the banner before applying to the final project. Spray or roll on protectants can also be used but may not provide uniform coverage.

FINISHING EDGES

If the banner is not laminated, stitch hem side up to avoid scratching the image. For maximum reinforcement, use a double stitched hem with a double lock stitch and a maximum of 5 stitches per inch. Recommended thread for sewing is size 69 Nylon (or Poly) Bonded.

SEWING

If the banner is not laminated, stitch hem side up to avoid scratching the image. For maximum reinforcement, use a double stitched hem with a double lock stitch and a maximum of 5 stitches per inch.

BANNER TAPE

Apply high tack banner tape to the back of the banner. Fold the edges over and press securely. It is recommended to pretest banner tape before applying to the final project.

INSTALLING GROMMETS & REINFORCING CORNERS

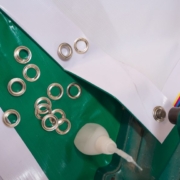
Install grommets every 2’ in the hemline along the length of the banner so that the grommet goes through both layers of the banner. For added durability and strength, reinforcements can be made with 2” to 3” patches of nylon, adhesive grommet tabs or an additional piece of the banner. Grommets should go through all corner layers.

CUTTING WIND SLITS

Cutting wind slits on scrim banners over 10’ is an option. Cut 6” wind slits in the shape of a half moon, in the direction of the letter U, approximately 2’ apart across the center of the banner.

HANGING

Corners can be secured using the installed rope, bungee cords or zip ties. Apply equal tension on all 4 corners assuring the banner is taut but not tight. Too much tension can result in premature failure. The banner should not flap in the wind.

The most effective way to hang a banner from a ceiling is to use pole pockets. Pole pockets are sewn or welded into the top and bottom edges of the banner and rigid poles are inserted into these openings. Attach wire, cable or rope to the top pole and the fastening to the ceiling. Inserting a pole into the bottom pocket adds weight keeping the banner rigid and flat.

WATER RESISTANCE & SURFACE PROTECTION

Pigment, solvent, latex and UV inks provide a high level of water resistance. Higher ink saturation can affect the water fast properties and show ink bleed in heavily saturated areas. Liquid lamination is recommended for DMIBOP because dirt and stains cannot be cleaned from the inkjet surface. GFIOP, SLEEK, and POSTERMAX do not need overprotection. Vinyl and polyester laminates are not recommended for wallcoverings. Excessive folding or creasing of the media may cause damage.

SURFACE PREPARATION

Walls should be prepped to a smooth, clean and dry surface prior to installation. Wallcoverings will not hide imperfections such as nails, holes or bumps. Failure to remove old wallcovering(s) may result in adhesion failure of the newly installed wallcovering.

Acrylic primer should be used on unpainted drywall. This will provide a sound surface for the wallcovering to adhere to. Apply primer over surfaces that have glossy paint for best results. ROMAN PRO-977 Ultra Prime Wallcovering Primer/Sealer is recommended and it can be purchased at most home improvement stores.

NONPASTED WALLCOVERINGS

PRO-880 Ultra Clear Premium Clear Strippable Wallcovering Adhesive and Golden Harvest GH-34 paste all provide good adhesion and allow for easier stripping in the removal process. Clay adhesives such as PRO-732 Extra Strength™ Clay Wallcovering Adhesive, PRO-774 Clay Strippable Wallcovering Adhesive can also be used. More aggressive adhesives such as ROMAN PRO-838 Heavy Duty Clear Wallcovering Adhesive should only be used for permanent applications.

The products listed above can be purchased at most home improvement stores. Apply a thin film of the adhesive using a 1/2” nap paint roller on the back of the paper. “Book” the wallpaper by folding the paste side on itself and make sure the side edges line up perfectly. Set the paper aside to allow the paste to soak in for 10 minutes.

PREPASTED WALLCOVERINGS (such as SLEEK)

Apply water on the back of each panel (strip) with a roller or submerse each panel in a wallpaper tray to activate the adhesive then “book” the wallpaper by folding the paste side on itself.

HANGING YOUR WALLCOVERINGS

Do not use tape on the imaged surface. Align top and adjoining edges. Smooth panels into place with a smoothing brush, starting at the center of the panel working toward the edges. Use a plastic smoother to push air pockets to the edges. The low wet expansion of these products allows double cutting at the seams.

BUTT SEAMS

Edges of the panels touch instead of overlapping. If the edges do not align perfectly at first, peel the wallcovering back and reposition. Use a roller to seal the seam. Reroll any seams that lift.

DOUBLE CUTTING

Overlap one panel of the wallcovering over the another so that the image or pattern is lined up. Use a straight edge and sharp blade to cut through the center of the overlapping wallcovering then peel away the cut strips. Smooth the wallcovering and wipe away any remaining adhesive.

CUTTING AROUND OBJECTS

Use caution when applying wallcoverings around switch plates. It is recommended to turn off the power source leading to the switch. Smooth the wallcovering over switch plates and then make diagonal cuts from the center to each corner. Press the wallcovering down around the edge of the switch plate, then lightly mark the outer edge of the plate and trim the excess. For round objects, such as light fixtures, cut a star shape into the wallcovering. Press the wallcovering down around the edge of the object, lightly mark the outer edge of the object and trim the excess.

REMOVING WALLCOVERINGS

Start at the top of the wallpaper and carefully separate a full-width strip about 8” down from the top away from the surface. If you are not able to separate the paper from the wall, apply water with a damp sponge to moisten the paper surface. Slowly pull the paper at the downward angle with both hands. Any excess adhesive can be removed with a damp sponge.

optimum printing

The levels of heat and humidity in the printing environment can have a negative impact on image quality. It’s important to always keep the levels stable and within the recommended guidelines of the printer manufacturer. It’s lucky for us that digital printers work best in the same environmental conditions preferred by people.

The optimum levels of temperature and relative humidity (rH) in a print environment is 68°F (20°C) at 50-60% rH. A thermometer can be used to measure the temperature and a hygrometer can be used to measure the relative humidity. A hygrometer is an instrument used for measuring the amount of humidity in the atmosphere (or print environment).

Prints produced in high rH printing environments take much longer to dry and exhibit poor ink adhesion. High relative humidity also increases the amount of dot gain, image bleed, and coating/image tack. Prints produced in lower rH printing environments will dry faster and will exhibit better ink adhesion. The prints will also have less dot gain, image bleed, and coating/image tack.

Temperature in the print environment can be controlled properly with a high-quality HVAC system. A programmable thermostat is recommended to keep the temperature stable within +/-  1°F. An evaporative humidifier can be used to increase the relative humidity in the print environment. A dehumidifier can be used to decrease the relative humidity in the print environment.

printer

You can fix most common print quality issues yourself before calling for technical support. The following information will help you troubleshoot the problem.

Print is Blurry or Smeared

• Make sure the media is acclimated to the printer environment for at least 48 hours.
• Check the Media Type setting. Make sure it is correct for the media you are using in the printer.
If the exact media type is not available in the printer driver, choose a media setting with a similar material type and thickness.
• Make sure the printable side is face-up when loaded in the printer. Also, make sure the media is compatible with your ink type.
• Check for an ink leak inside the printer. Clean up excess ink inside the printer using a soft, clean cloth.
• Clean the printheads. Use the printer’s Head Cleaning utility or manually clean the print heads.
Print has Smears on the Leading Edge
• If the edge of the media is curled in the direction of the printable side, flatten it or curl it toward the opposite side.
Also, try spooling out one or two feet of media past the platen. It will prevent the print heads from striking the curled edge.
• Check the Media Type setting. Make sure it is correct for the media you are using in the printer.
• Adjust the PLATEN GAP or HEAD HEIGHT to the proper distance for the loaded media.

Poor Ink Adhesion

All Printers

• Make sure the media is acclimated to the printer environment for at least 48 hours.
• Check the Media Type setting. Make sure it is correct for the media you are using in the printer.
If the exact media type is not available in the printer driver, choose a media setting with a similar material type and thickness.
If there is too much ink on the media, choose a media setting with a lower ink limit.
• If applicable to your printer, set the printer to the correct temperature for the media. Thicker media may require a higher temperature than thin media.
• Make sure the printable side is face-up when loaded in the printer.
• Set the printer to the correct speed for the media. Inkjet printers may require the number of passes to be increased or decrease for the media. Also, try to print in uni-direction mode.
• Older media (two years past the manufactured date) may be unprintable due to changes in its composition. Discard expired media and replace it with fresh product.

UV Printers

• Increase the intensity of the UV lamps.
• Increase the number passes for the media.
• Print in uni-direction mode.
• If there is too much ink on the media, choose a media setting with a lower ink limit.

Horizontal Banding

• Make sure the media is acclimated to the printer environment for at least 48 hours.
• Check the Media Type setting. Make sure it is correct for the media you are using in the printer.
If the exact media type is not available in the printer driver, choose a media setting with a similar material type and thickness.
• Make sure the printable side is face-up when loaded in the printer. Also, make sure the media is compatible with your ink type.
• Clean the print heads. Use the printer’s Head Cleaning utility or manually clean the print heads.
• Decrease the media compensation or feed rate for white banding. Increase the media compensation or feed rate for dark banding.
• Check the levels of the ink cartridges. Replace ink cartridges if they are low or empty.

Vertical Banding or Misalignment

• Make sure the media is acclimated to the printer environment for at least 48 hours.
• Check the Media Type setting. Make sure it is correct for the media you are using in the printer.
If the exact media type is not available in the printer driver, choose a media setting with a similar material type and thickness.
• Print in uni-direction mode.
• Adjust the PLATEN GAP or HEAD HEIGHT to the proper distance for the loaded media.
• Run the printer’s Print Head Alignment utility for the loaded media.

Print is Light or it Looks Faded

• Check that the ink cartridges have not exceeded their expiration date. The expiration date is on the cartridge label.
• Check the Media Type setting. Make sure it is correct for the media you are using in the printer.
If the exact media type is not available in the printer driver, choose a media setting with a similar material type and thickness.
• Clean the print heads. Use the printer’s Head Cleaning utility or manually clean the print heads.
• Check the levels of the ink cartridges. Replace ink cartridges if they are low or empty

PRODUCT CURL

Many specialty media products develop “roll set curl” from being wound onto cores.  Allowing the material to equilibrate to the printing environment for 24hrs before printing can help reduce the excessive curl and minimize the impact on media loading and printing.

Media exposed to high humidity will be more susceptible to curling when loaded on the printer. It’s best practice to keep the print environment at 50% relative humidity and the air temperature at 70˚F. Also, adjusting the platen heater to extreme temperatures may result in buckling of the loaded media. Best practice suggests heater settings between 40˚C – 45˚C.

There are two methods for properly loading media on a printer that reduce the risk of a head strike.

METHOD 1

Advance the edge of the media 6” past the platen when loading it to avoid head strikes. This method is good for media with a slight curl.

METHOD 2

Advance the edge of the media at least 12” past the platen when loading it. Secure the end of the media to the printer take up reel with masking tape. One piece of tape in the center, one piece on the left and one piece on the right. Adjust the take-up reel to a sufficient degree of tension (if applicable) before starting the printer. Check to make sure the tape does not break free after starting the printer. This method is best for media with a moderate curl.

Fine art prints present unique challenges to the artist when it is time to finish or store the final print. Pigment-based inks do offer better fade resistance over time than dye-based inks, but they are more susceptible to damage. A fine art print can be harmed by fingerprints, foreign substances, humidity and ozone just like an original piece of art. Fortunately, you can protect the print and extend its lifespan by following the tips below.

Surface Protection

Original canvas art has been protected for centuries using varnish, but it’s incompatible with canvas inkjet prints. The protective coating should be waterproof, flexible and non-yellowing to provide complete protection for the canvas print. A product like PremierArt’s Eco Print Shield is water-based and offers a complete protection solution for fine art canvas prints. It comes in a variety of finishes and it can be applied with a high-density foam roller or sprayed on with an HVLP gun.

Fine art paper prints are typically displayed under glass and do not require a protective coating. Archival prints with matte black ink on cotton paper are prone to scuffing during regular handling or during the framing process, though. Damage from fingerprints, moisture, and scuffing can be avoided by spraying a coating of PremierArt’s Print Shield on the print. It can double the life of your fine art prints and allow you to display them without a glass overlay.

Mounting

Fine art paper prints can be mounted on archival mount board using acid-free spray adhesive. Optionally, you can purchase premade adhesive mounting boards to save a step and some time. All dust and debris should be eliminated from the work area to prevent bumps in the finished piece. You’ll then apply the print to the adhesive surface and use a brayer to smooth it out. It’s important, regardless of the option you choose, to make sure all products are labeled acid-free.

Framing

Traditionally, artists choose to display fine art paper prints in a frame under glass. The print should be mounted on an archival quality board with matting and UV glass or UV surface protectant. You should allow at least a 1/8” of overall extra space between the finished piece and the edge of the frame. The framed fine art print should be checked at least every three years to identify and correct any potential problems.

Fine art canvas prints can be stretched on a frame using the same methods as original canvas art. The canvas print should have 4” of extra canvas on all the sides. The canvas is stapled to stretcher bars, one edge at a time while keeping the canvas under tension until it is secured on all four sides. Cross braces should be added for larger prints to prevent the canvas from sagging while it is on display.

Storage

Fine art prints should be stored in a climate-controlled environment where temperature and humidity are closely monitored. The temperature should be set between 59ºF and 68ºF with a relative humidity level of 40-60%. Archival prints can be harmed by light and may fade faster than expected when exposed to it. Avoid storage in areas with direct sunlight or use a UV protectant to prevent damage if the prints may be exposed to UV rays.

Fine art prints can be enjoyed for centuries on display with proper finishing techniques and storage. The options we presented in this guide should ensure success in the final stages of your fine art printing project. Remember to always choose archival rated products when finishing your print and make sure you store it properly to protect it