
Banner Installation
PROTECTING THE BANNER
A thin pressure sensitive adhesive overlaminate can be used to protect most banners except for vinyl. Applying laminates to one side of a banner may result in inwards curling and adhesion failure. It is recommended to pretest all protectants on a sample of the banner before applying to the final project. Spray or roll on protectants can also be used but may not provide uniform coverage.
FINISHING EDGES
If the banner is not laminated, stitch hem side up to avoid scratching the image. For maximum reinforcement, use a double stitched hem with a double lock stitch and a maximum of 5 stitches per inch. Recommended thread for sewing is size 69 Nylon (or Poly) Bonded.
SEWING
If the banner is not laminated, stitch hem side up to avoid scratching the image. For maximum reinforcement, use a double stitched hem with a double lock stitch and a maximum of 5 stitches per inch.
BANNER TAPE
Apply high tack banner tape to the back of the banner. Fold the edges over and press securely. It is recommended to pretest banner tape before applying to the final project.
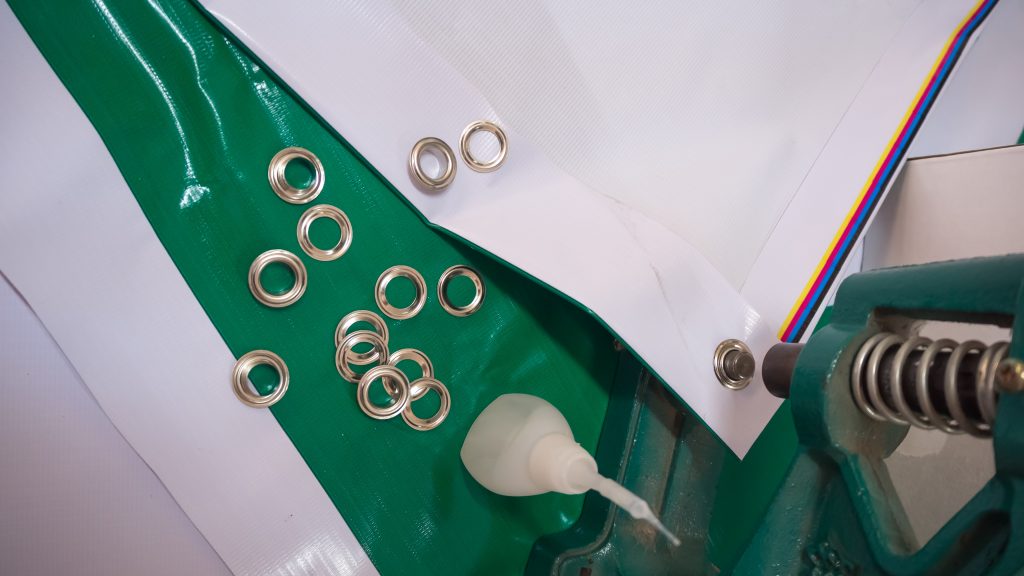
INSTALLING GROMMETS & REINFORCING CORNERS
Install grommets every 2’ in the hemline along the length of the banner so that the grommet goes through both layers of the banner. For added durability and strength, reinforcements can be made with 2” to 3” patches of nylon, adhesive grommet tabs or an additional piece of the banner. Grommets should go through all corner layers.
CUTTING WIND SLITS
Cutting wind slits on scrim banners over 10’ is an option. Cut 6” wind slits in the shape of a half moon, in the direction of the letter U, approximately 2’ apart across the center of the banner.
HANGING
Corners can be secured using the installed rope, bungee cords or zip ties. Apply equal tension on all 4 corners assuring the banner is taut but not tight. Too much tension can result in premature failure. The banner should not flap in the wind.
The most effective way to hang a banner from a ceiling is to use pole pockets. Pole pockets are sewn or welded into the top and bottom edges of the banner and rigid poles are inserted into these openings. Attach wire, cable or rope to the top pole and the fastening to the ceiling. Inserting a pole into the bottom pocket adds weight keeping the banner rigid and flat.

